Excel functions for changing text case
Excel functions for changing text case
Microsoft Excel has three special functions that you can use to change the case of text. They are UPPER, LOWER and PROPER. The upper() function allows you to convert all lowercase letters in a text string to uppercase. The lower() function helps to exclude capital letters from text. The proper() function makes the first letter of each word capitalized and leaves the other letters lowercase (Proper Case).
All three of these options work on the same principle, so I'll show you how to use one of them. Let's take the Excel uppercase function as an example.
Enter an Excel formula
- Insert a new (helper) column next to the one that contains the text you want to convert.Note: This step is optional. If your table is not large, you can just use any adjacent blank column.
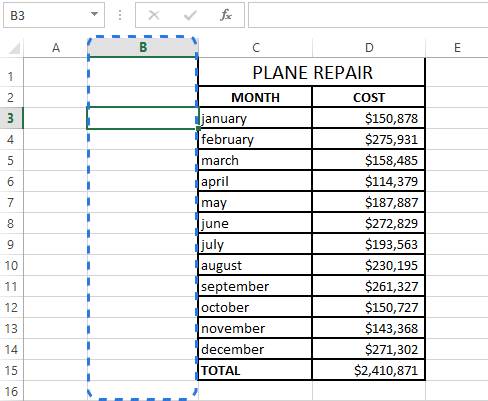
- Enter the equal sign (=) and function name (UPPER) in the adjacent cell of the new column (B3).
- Type in the appropriate cell reference in the parentheses (C3) after the function name.Your formula should look like this
=UPPER(C3), where C3 is the cell in the original column that has the text for conversion.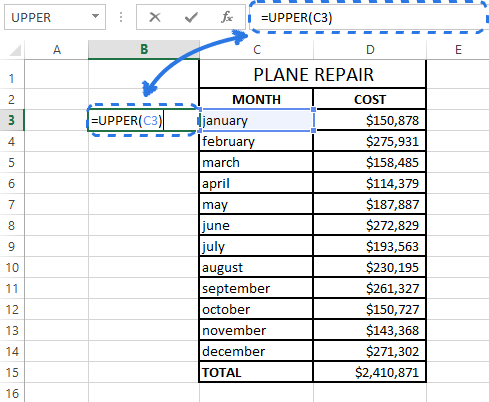
- Click Enter.
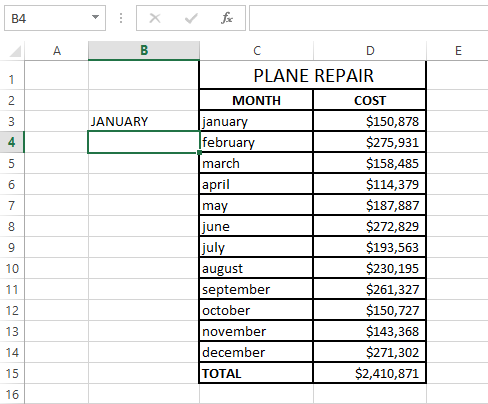 As you can see in the screenshot above, cell B3 contains the uppercase version of the text from cell C3.
Copy a formula down a column
Now you need to copy the formula to other cells in the helper column.
- Select the cell that includes the formula.
- Move your mouse cursor to the small square (fill handle) in the lower-right corner of the selected cell until you see a small cross.
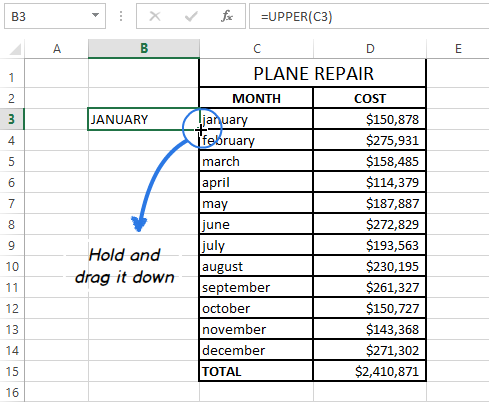
- Hold the mouse button and drag the formula down over the cells where you want it to apply.
- Release the mouse button.
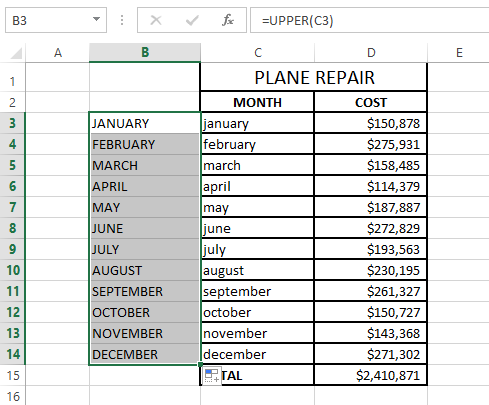 Note: If you need to fill the new column down to the end of the table, you can skip steps 5-7 and just double-click on the fill handle.
Remove a helper column
So you have two columns with the same text data, but in different case. I suppose you'd like to leave only the correct one. Let's copy the values from the helper column and then get rid of it.
- Highlight the cells that contain the formula and press Ctrl + C to copy them.
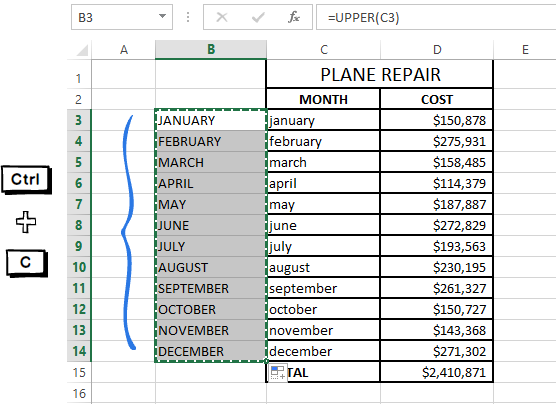
- Right-click on the first cell in the original column.
- Click on the Values icon under Paste Options in the context menu.
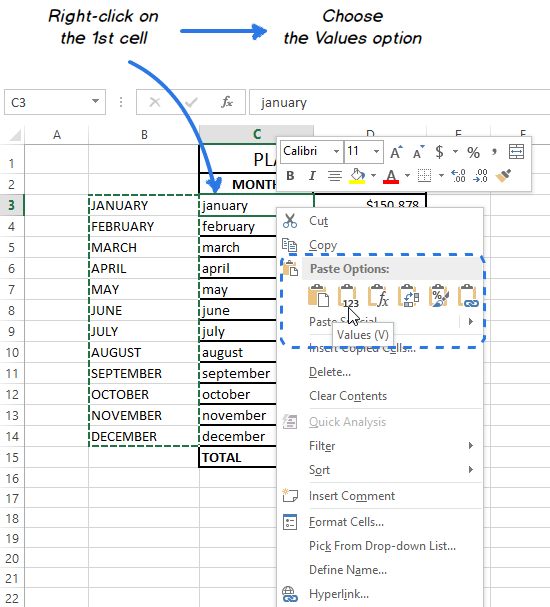 Since you need only the text values, pick this option to avoid formula errors later.
 - Right-click the selected helper column and choose the Delete option from the menu.
- Pick Entire column in the Delete dialog box and click OK.
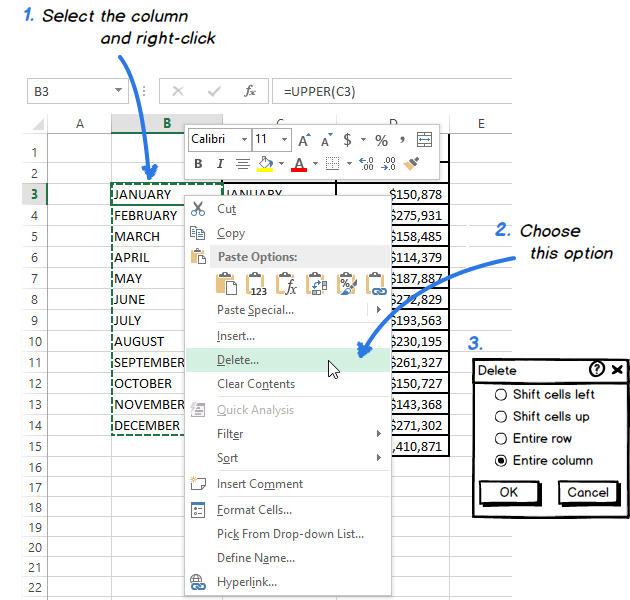
Here you are!

This theory might look very complicated to you. Take it easy and try to go through all these steps yourself. You'll see that changing case with the use of Excel functions is not difficult at all.
Use Microsoft Word to change case in Excel
If you don't want to mess with formulas in Excel, you can use a special command for changing text case in Word. Feel free to discover how this method works.
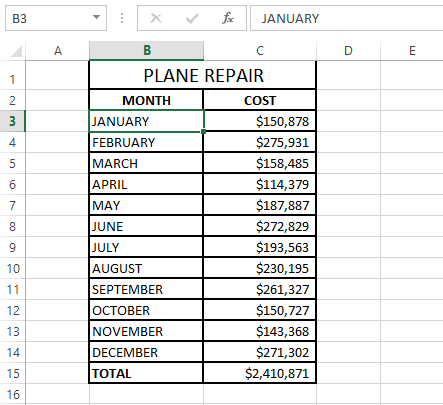
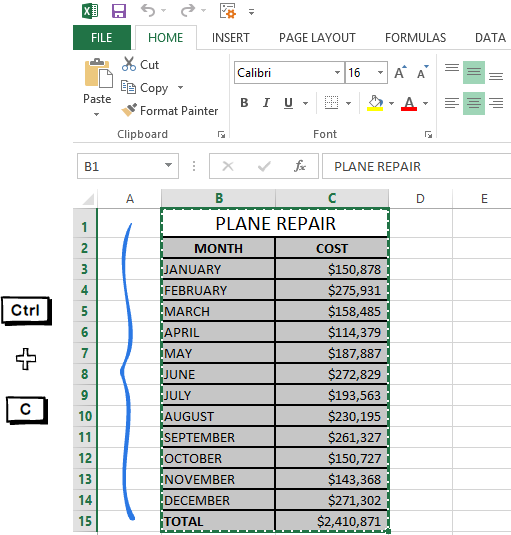
- Select the range where you want to change case in Excel.
- Press Ctrl + C or right-click on the selection and choose the Copy option from the context menu.
- Open a new Word document.
- Press Ctrl + V or right-click on the blank page and select the Paste option from the context menu
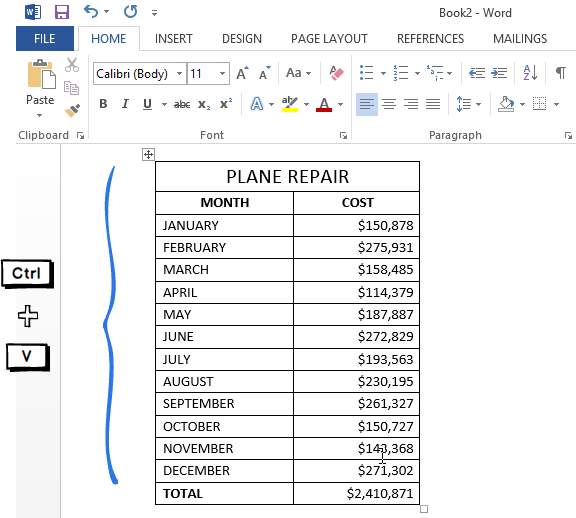 Now you've got your Excel table in Word.
- Highlight the text in your table where you want to change the case.
- Move to the Font group on the HOME tab and click on the Change Case icon.
- Pick one of 5 case options from the drop-down list.
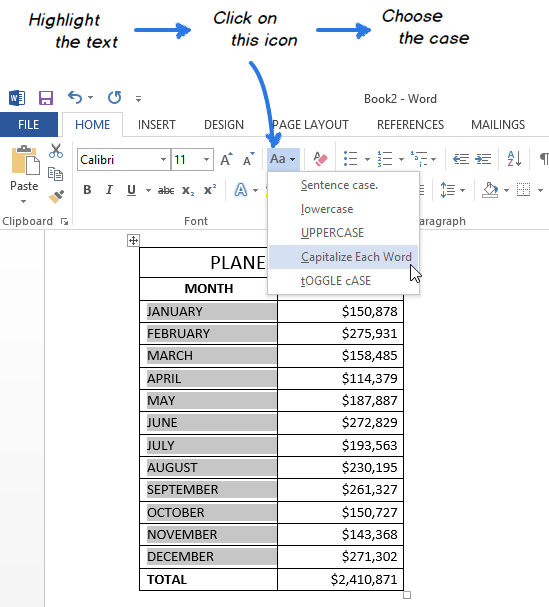 Note: You can also select your text and press Shift + F3 until the style you want is applied. Using the keyboard shortcut you can choose only upper, lower or sentence case.
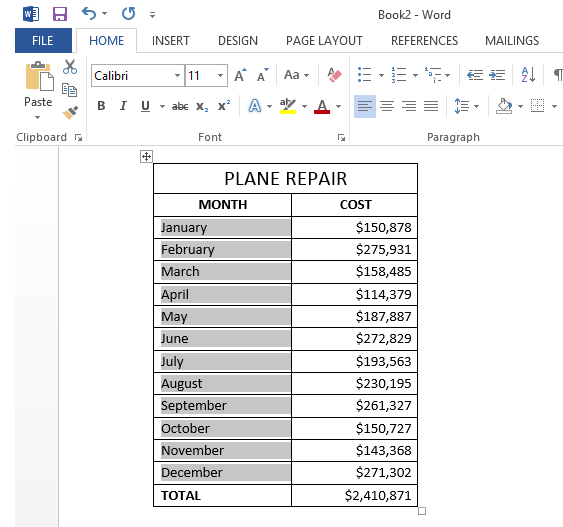
Now you have your table with the text case converted in Word. Just copy and paste it back to Excel.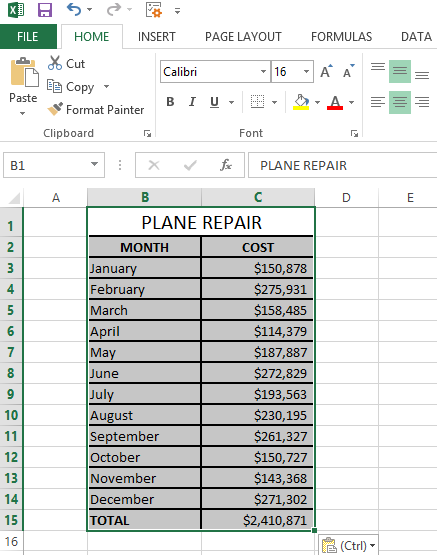
Converting text case with a VBA macro
You can also use a VBA macro for changing case in Excel 2010 / 2013. Don't worry if your knowledge of VBA leaves much to be desired. A while ago I didn't know much about it as well, but now I can share three simple macros that make Excel convert text to uppercase, proper or lowercase.I won't labor the point and tell you how to insert and run VBA code in Excel because it was well described in one of our previous blog posts. I just want to show the macros that you can copy and paste into the code Module.If you want to convert text to uppercase, you can use the following Excel VBA macro:SubUppercase()ForEachCellInSelectionIfNotCell.HasFormulaThenCell.Value = UCase(Cell.Value)EndIfNextCellEndSubTo apply Excel lowercase to your data, insert the code shown below into the Module window.SubLowercase()ForEachCellInSelectionIfNotCell.HasFormulaThenCell.Value = LCase(Cell.Value)EndIfNextCellEndSubPick the following macro if you want to convert your text values to proper / title case.SubPropercase()ForEachCellInSelectionIfNotCell.HasFormulaThenCell.Value = _Application _.WorksheetFunction _.Proper(Cell.Value)EndIfNextCellEndSubQuickly change case with the Cell Cleaner add-in
Looking at the three methods described above you might still think that there is no easy way to change case in Excel. Let's see what the Cell Cleaner add-in can do to solve the problem. Probably, you'll change your mind afterwards and this method will work best for you. - Download the add-in and install it on your computer.After the installation the new Ablebits Data tab appears in Excel.
- Select the cells where you want to change the text case.
- Click on the Change Case icon in the Clean group on the Ablebits Data tab.
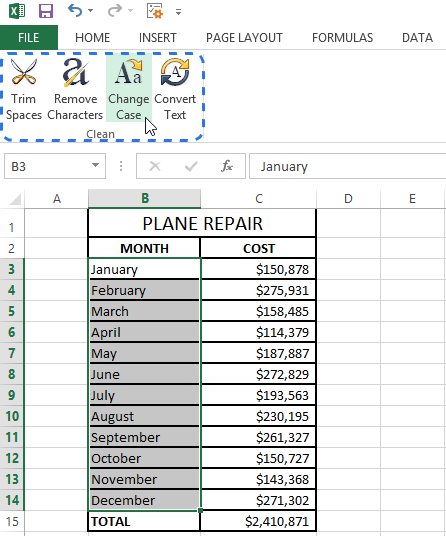 The Change case pane displays to the left of your worksheet.
 - Select the case you need from the list.
- Press the Change case button to see the result.
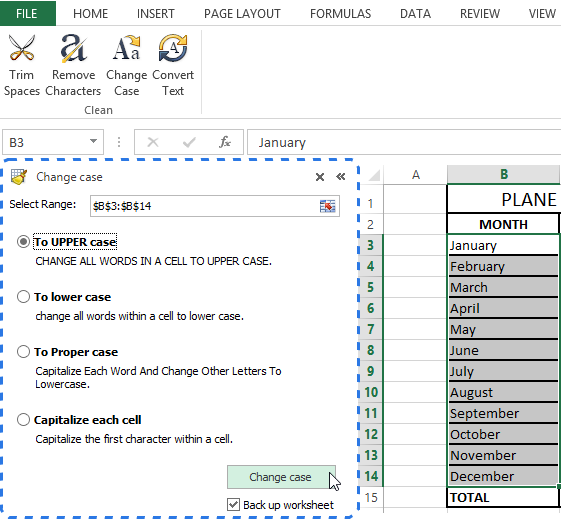 Note: If you want to keep the original version of your table, check the Back up worksheetbox.
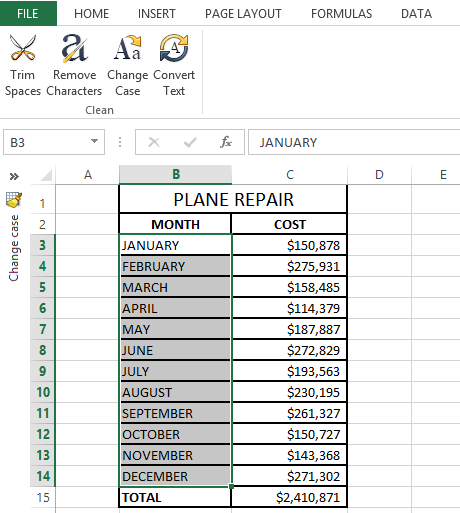
With Cell Cleaner for Excel the changing case routine seems to be much easier, doesn't it?
Besides changing text case Cell Cleaner can help you to convert numbers in the text format to the number format.............
Comments
Post a Comment